# Installation
The recommended development environment for Solidity++ is Visual Studio Code, for which Vite Labs has developed the Soliditypp extension containing a ready-to-go compiler and debugging environment. Follow the instructions below for installing and testing.
Manual Compiler Installation:
Instructions for installation without VSCode here. (not recommended for most users)
# Installing the Visual Studio Code Extension
Download and install Visual Studio Code (opens new window).
Within VSCode, navigate to the Extensions panel and search for "ViteLabs" and install the Soliditypp extension.
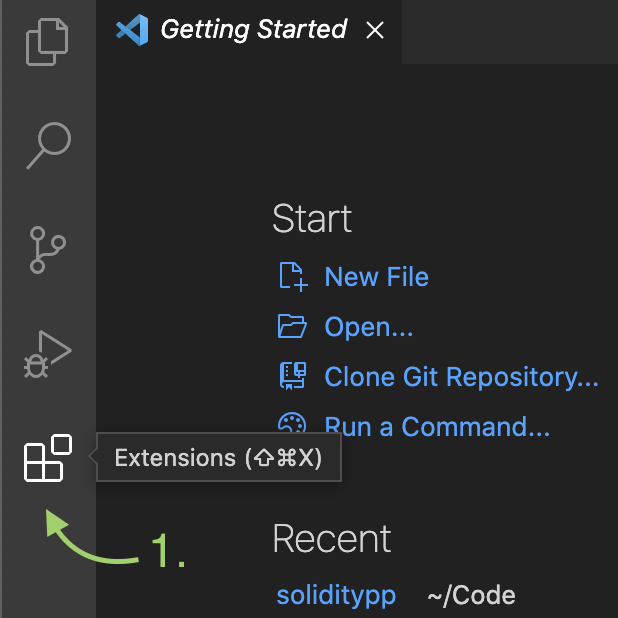
Open extensions panel.
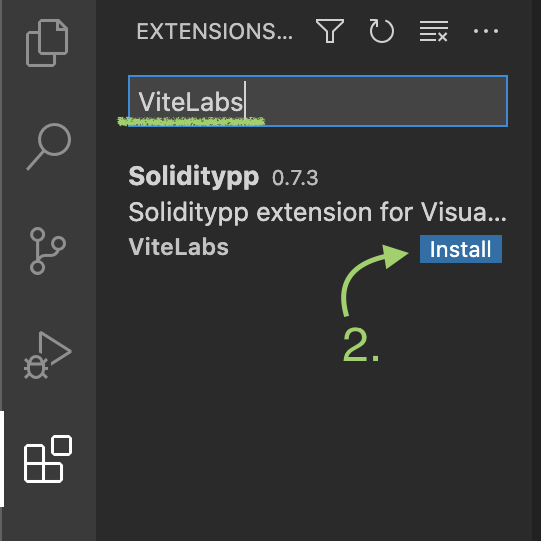
Install Soliditypp extension.
That's it! Now you can proceed to test your environment by deploying a contract.
# Deploying your first contract
Within VSCode, open a new folder for your Solidity++ projects.
Open the debug panel, and click the "create a launch.json file" link. Then choose "Soliditypp" for the environment.

Create a launch.json file.
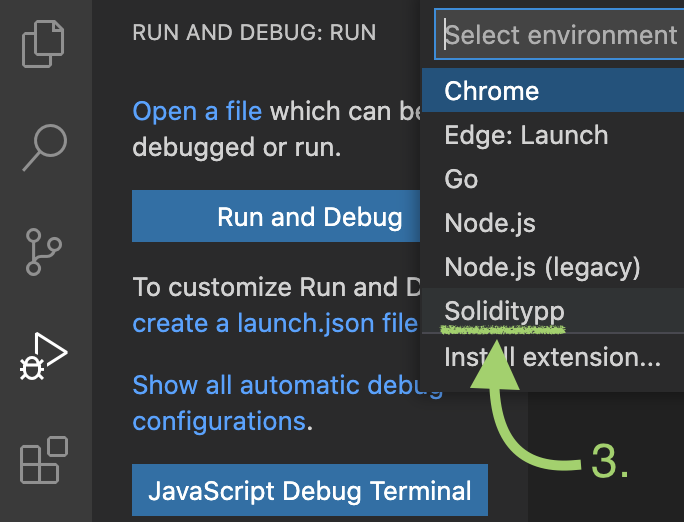
Choose "Soliditypp" enviornment.
This automatically generates a launch.json file which is used by VSCode to configure the debugger. You'll need to create this file for each of your Solidity++ project folders.
- Create a new file called
HelloWorld.solppand paste the following code below:
This HelloWorld contract redirects funds sent to the contract's sayHello function, while emitting a logging event. We will cover this contract in depth later, but for now let's compile and deploy it.
You can automatically generate a HelloWorld.solpp contract by using the Soliditypp VSCode extension. Simply press ⇧⌘P (Mac) or Ctrl+Shift+P (Windows) to open the Command Palette, and execute the command >soliditypp: Generate HelloWorld.solpp. This will create the HelloWorld.solpp in the current folder.
- Launch the debugger by pressing
F5. This automatically saves and compiles the source, and a browser window should pop up with the debugger interface shown below. This will take more time the first launch, but when the interface appears you're ready to deploy your first contract!
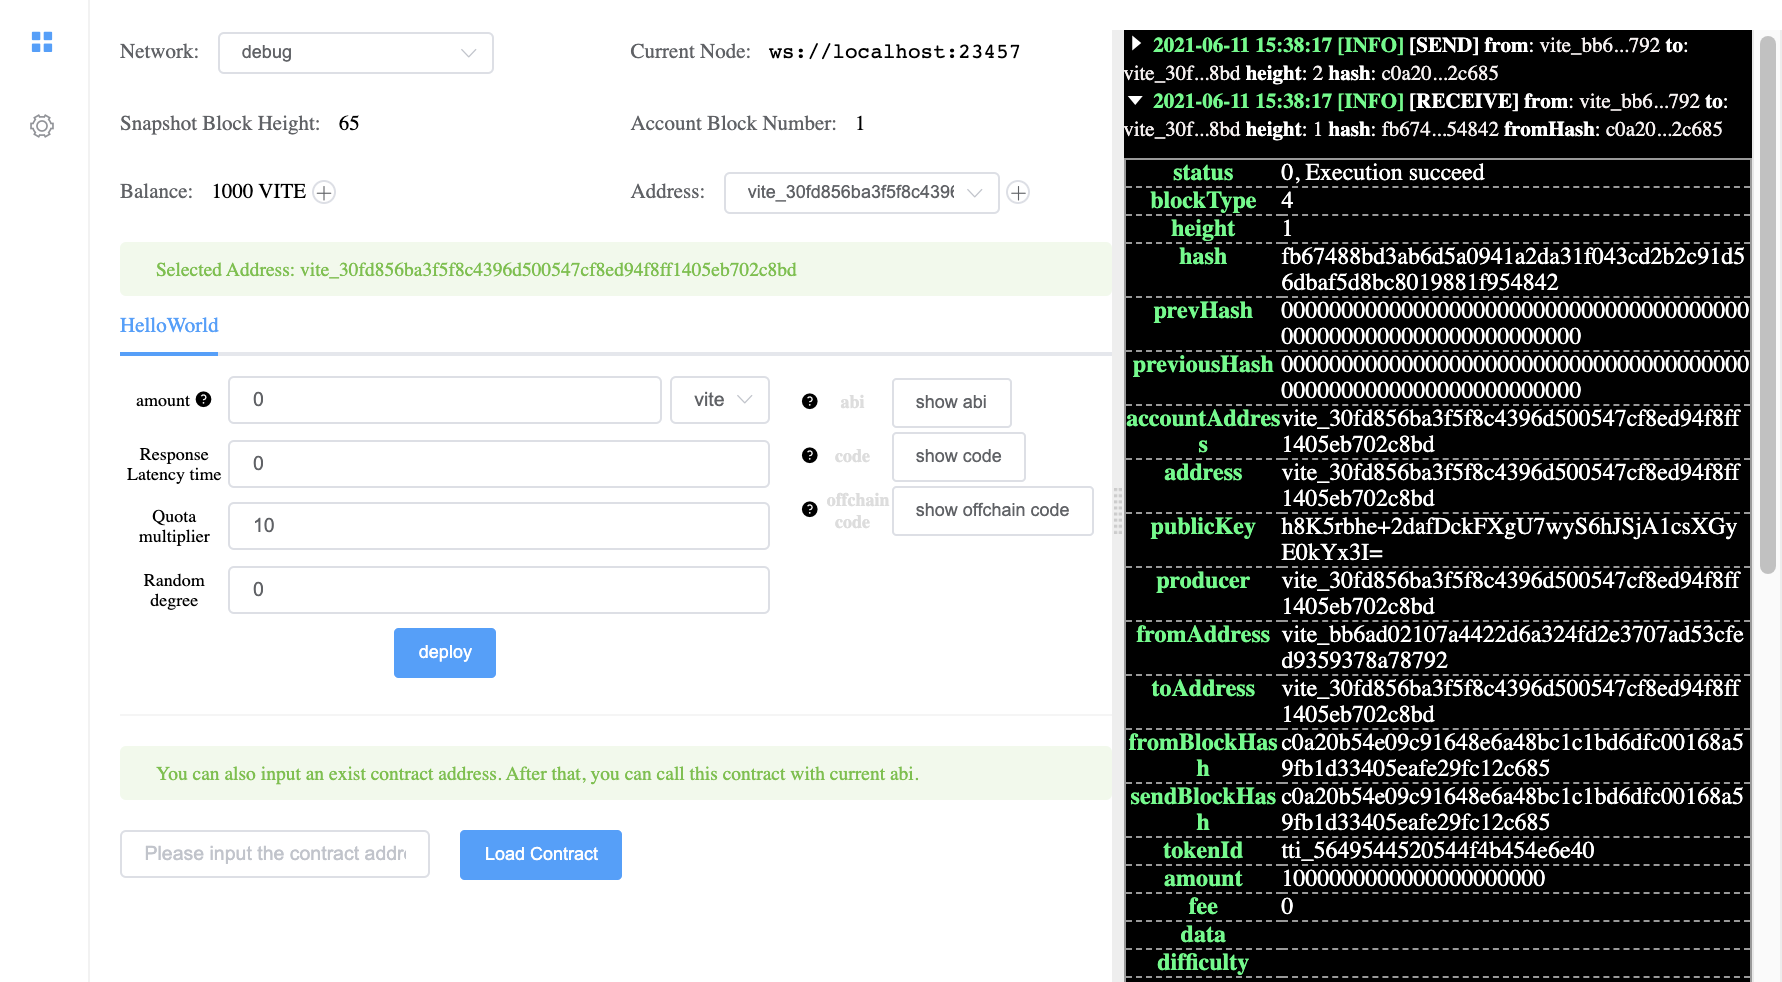
Debugger interface.
Gvite Version
Since 0.2.5, it's possible to specify the gvite release version by adding gviteVersion in launch.json in your working directory as below.
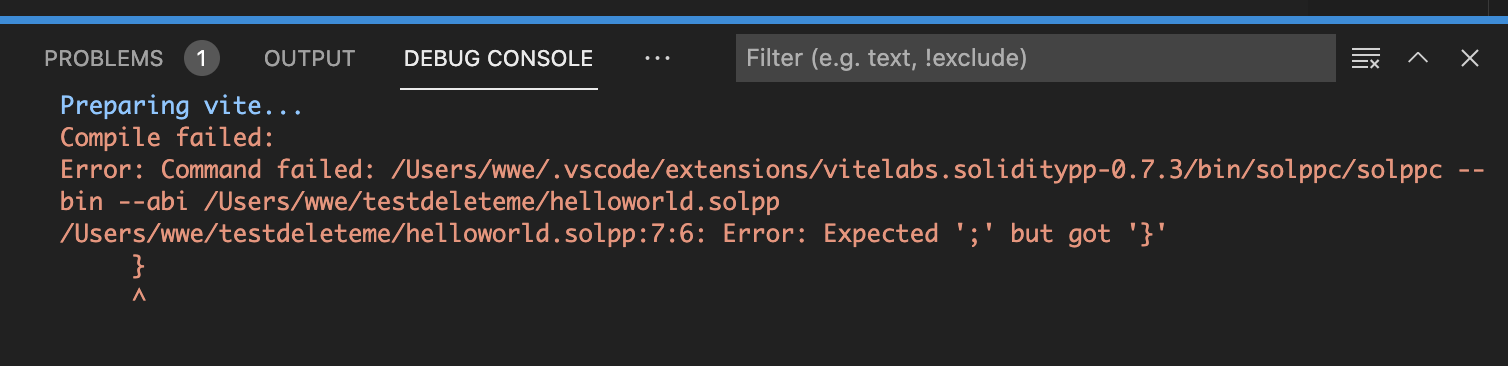
Compiler Errors
If the debugger interface doesn't launch, check the debug console and fix any errors:
- To deploy your contract on to the local debug node, simply press Deploy as shown below. There are several options available, but use the default values for now (later we will cover the other options available in the debug interface).
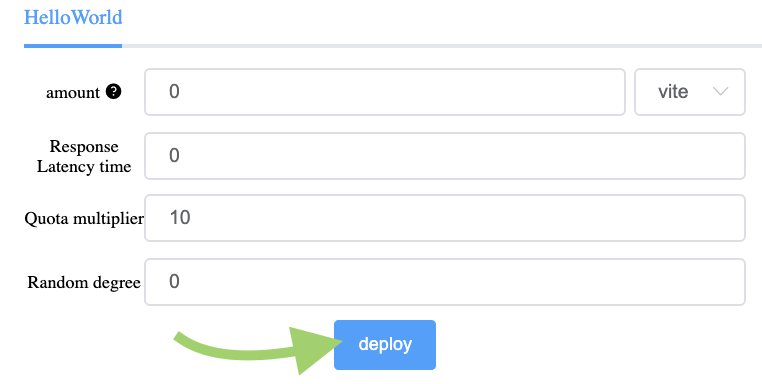
Deploy the contract.
- When the contract is successfully deployed, a contract interface will appear, shown below, which we can use to call our contract. The function
sayHellorequires an addressdestas an argument, so for testing let's copy our own address, which we can copy from the "Selected Address:" box.

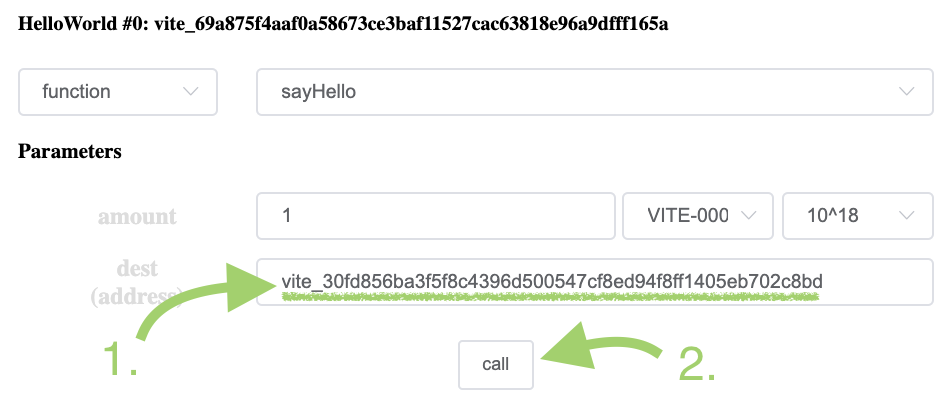
Call the contract function "sayHello".
- After calling the contract, a new log entry should appear on the right. Click on the most recent log entry to expand it, and scroll to the bottom. You should see the VMLog entry as shown below:
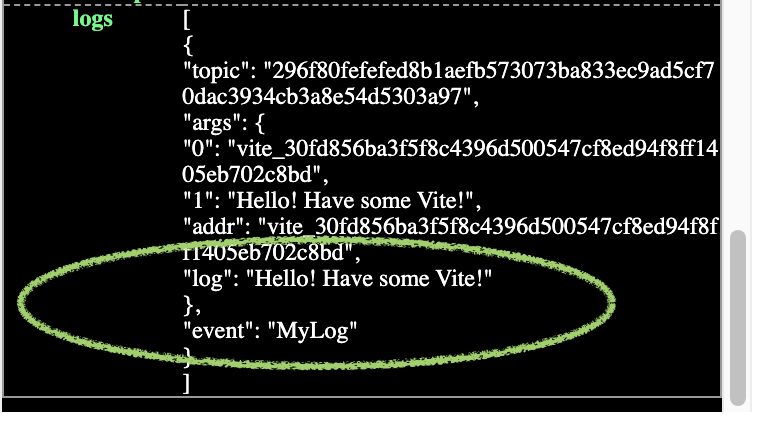
Successful VMlog output.
If so, congratulations, you've deployed and tested your first smart contract!
Other things to try:
- You can also try sending some Vite to the
sayHellofunction to see that funds are also transferred to the address you put in thedestparameter. - Try creating additional addresses and use
sayHelloto send Vite back and forth.
Common Issues:
The cost to deploy a contract (10 Vite) is automatically deducted. Do not send Vite to the contract when deploying in step 5. As the contract does not have a payable constructor, the contract deployment will fail.
The debug interface measures transactions in
attov, the smallest unit of Vite. If the quantity of Vite transferred seems small, check the multiplier (10^18 attov = 1 Vite).The debug interface can take some time to load, as a full gvite client must first be downloaded. Check the VSCode debug log for the node status.