# How to Use
The recommended development environment for Solidity++ is Visual Studio Code with the Soliditypp extension, which includes a latest version of Vite node, a solppc compiler and debugging environment.
# Install
Download and install Visual Studio Code (opens new window)
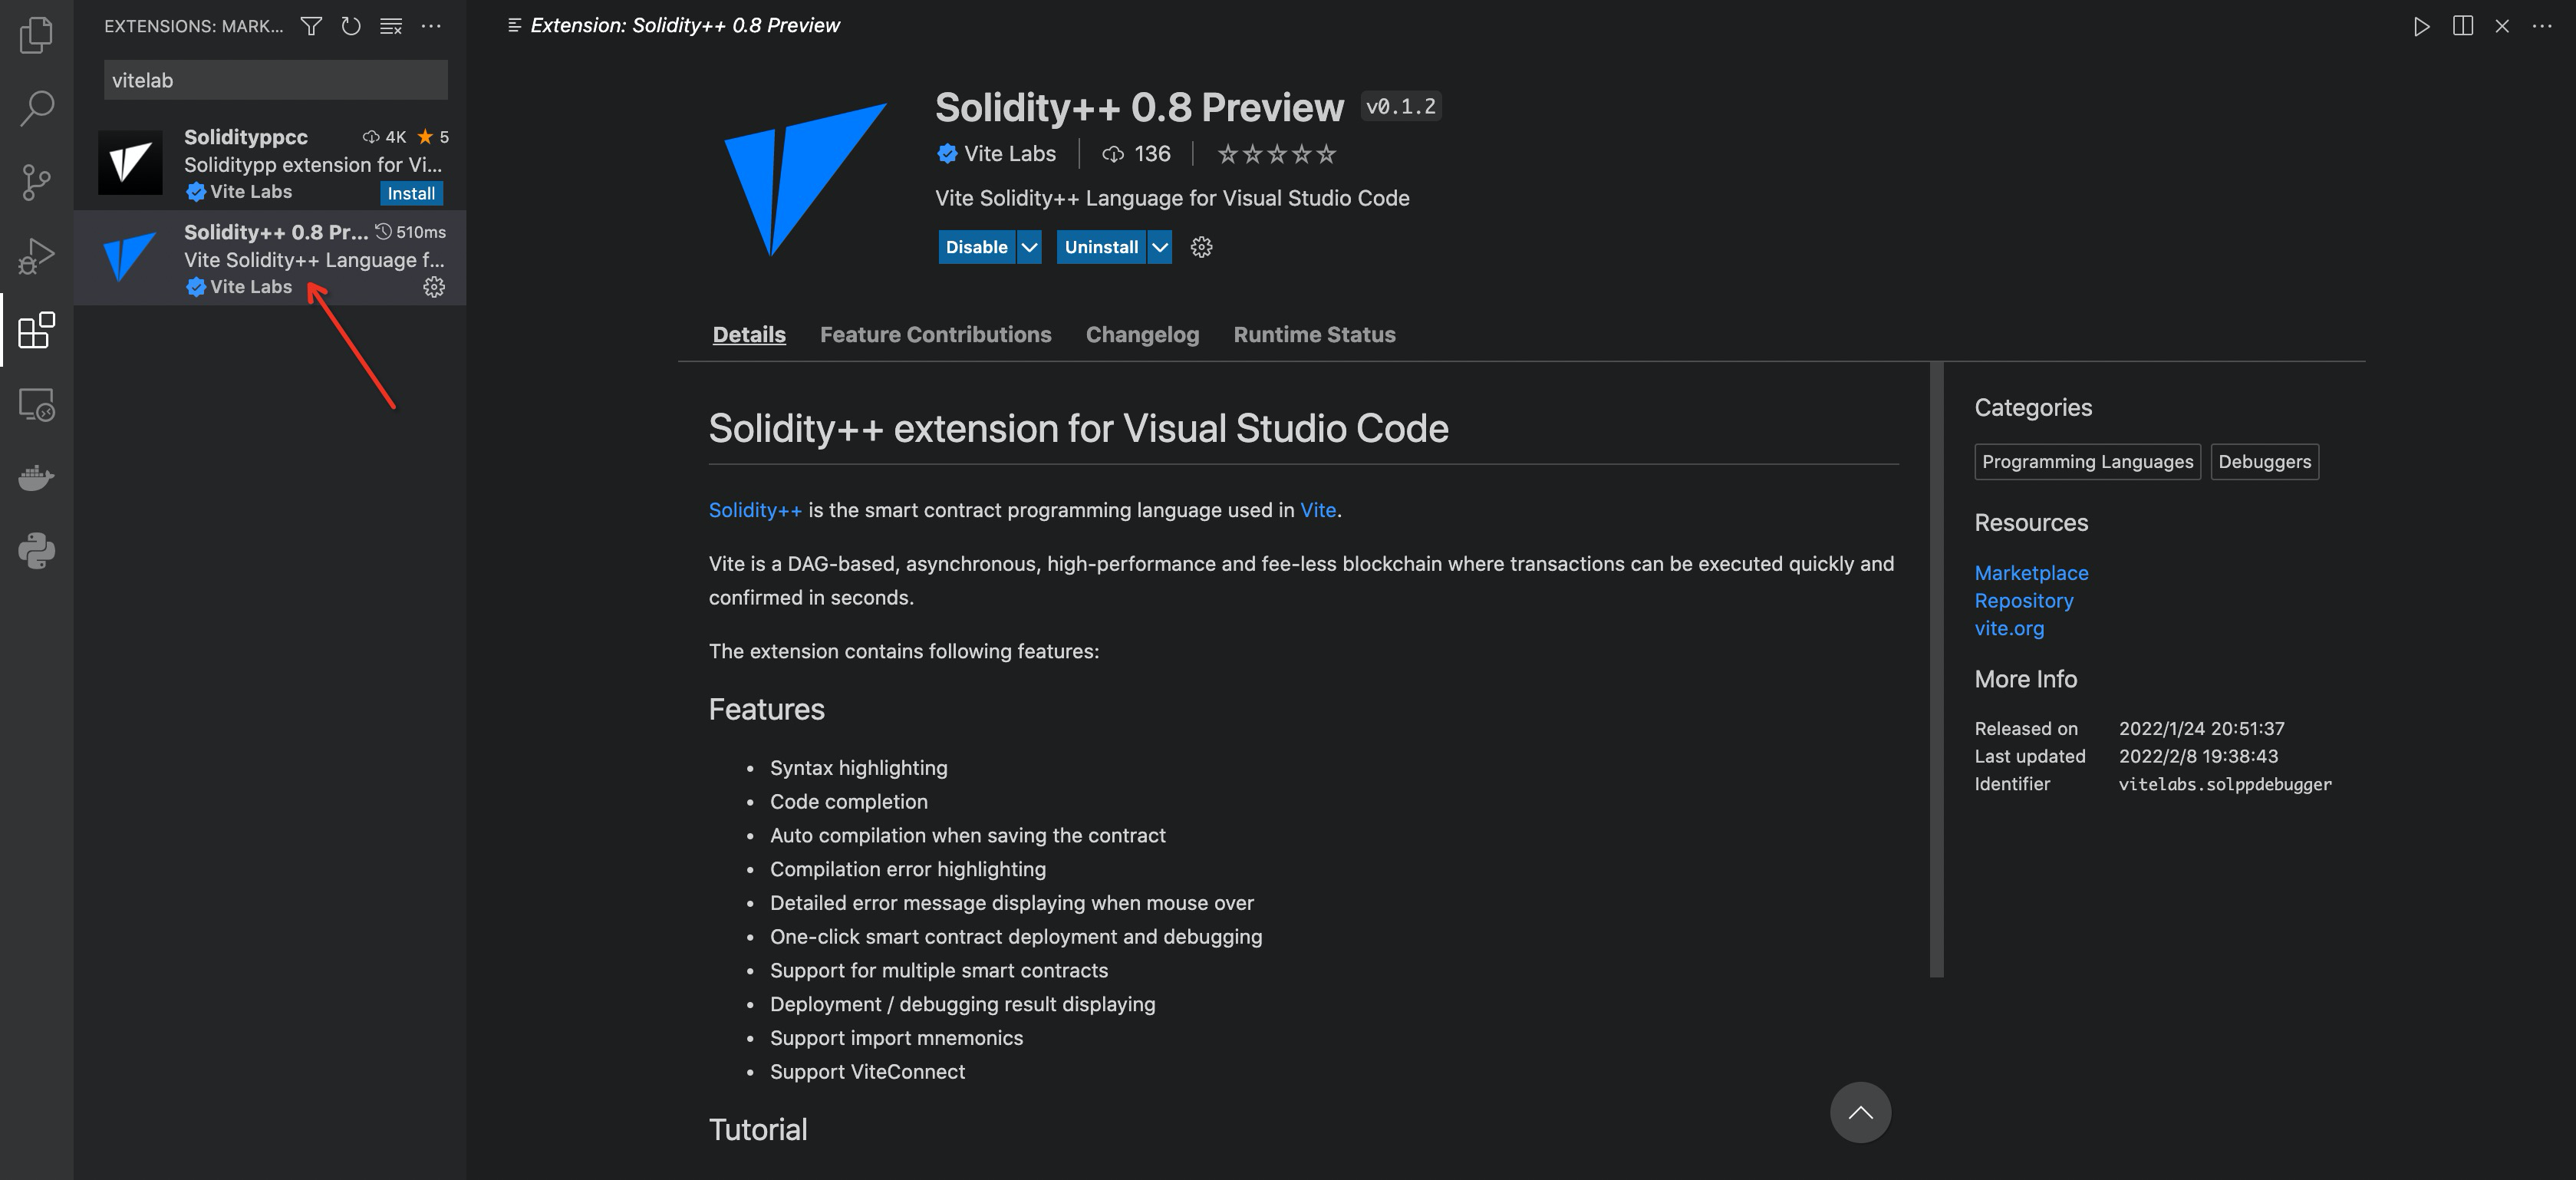
Launch VSCode, navigate to the Extensions panel and search for "soliditypp", install the Solidity++ 0.8 Preview extension.
That's it! Now you can proceed to test your environment by deploying a contract.
Legacy Extension
At current time, two versions of solidity++ extension will be returned. If you are working with a 0.4.x Solidity++ contract, install Solidityppcc.
# Write Contract
First create or specify a folder for your Solidity++ project.
Open the debug panel, and click on create a launch.json file link.
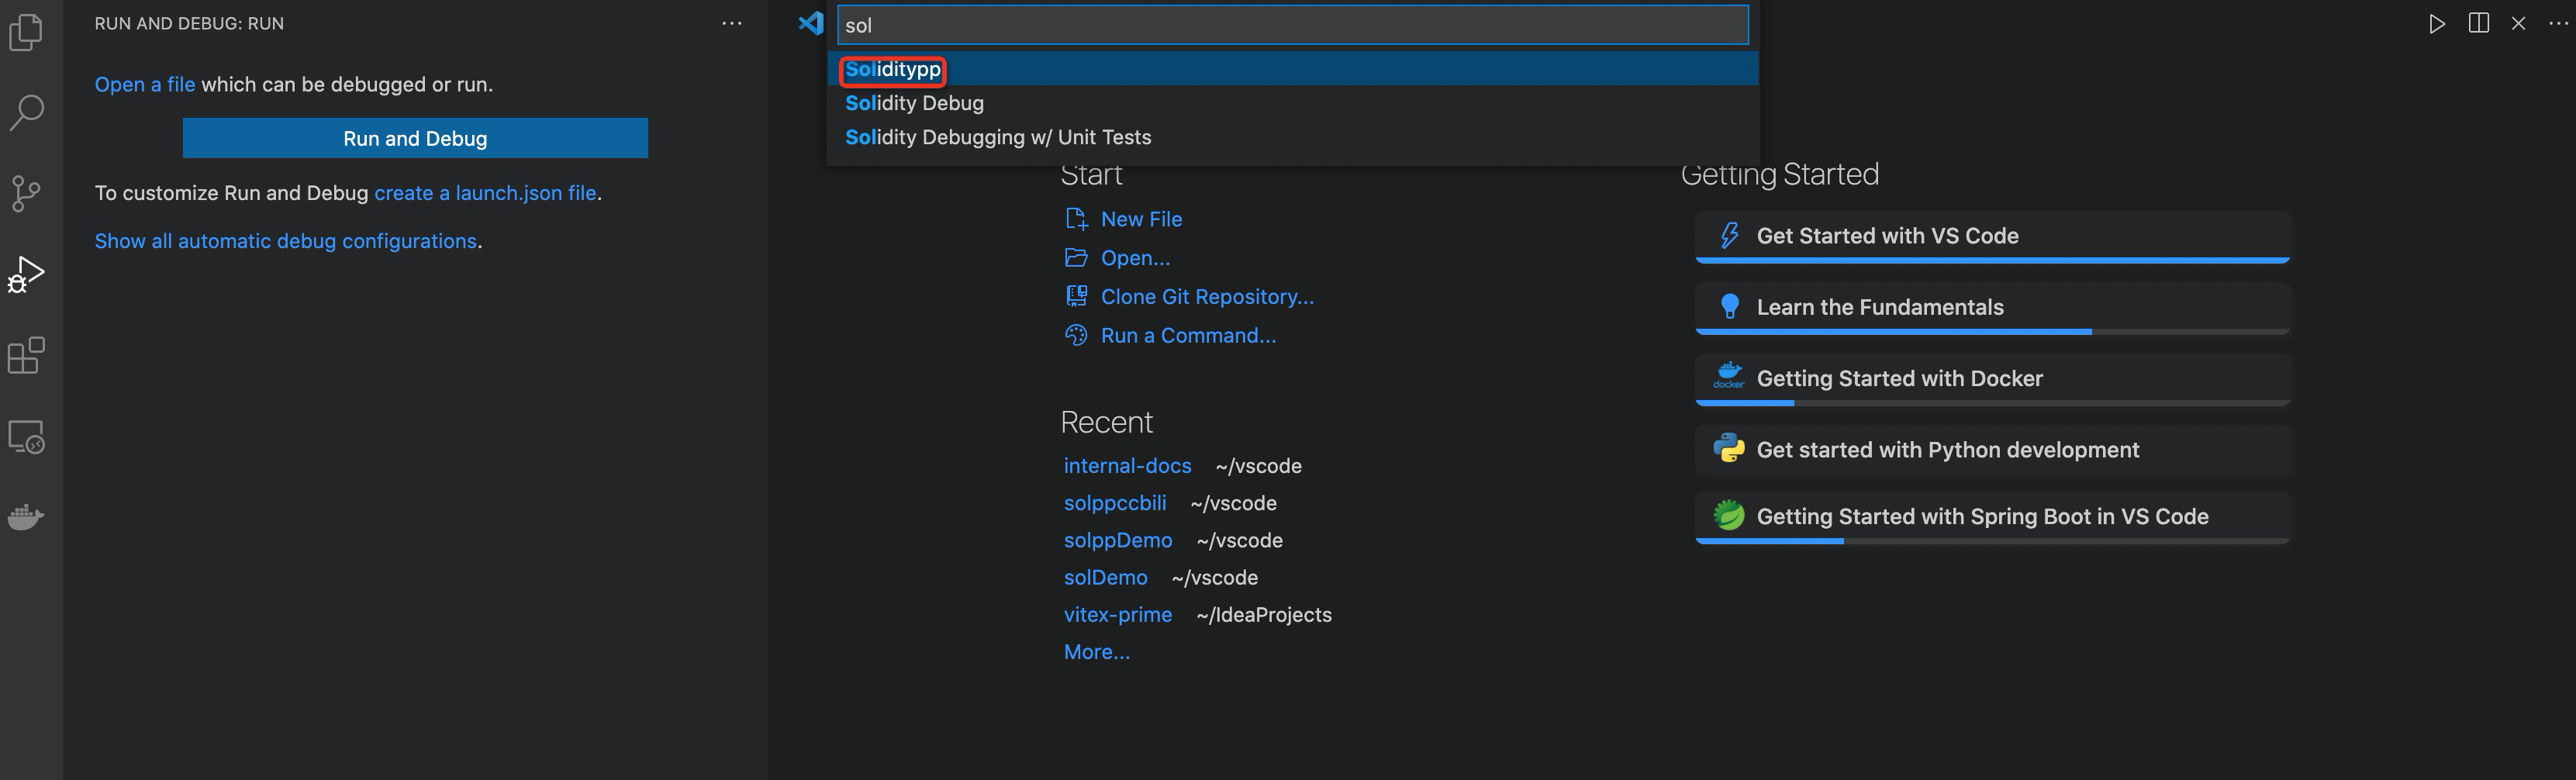
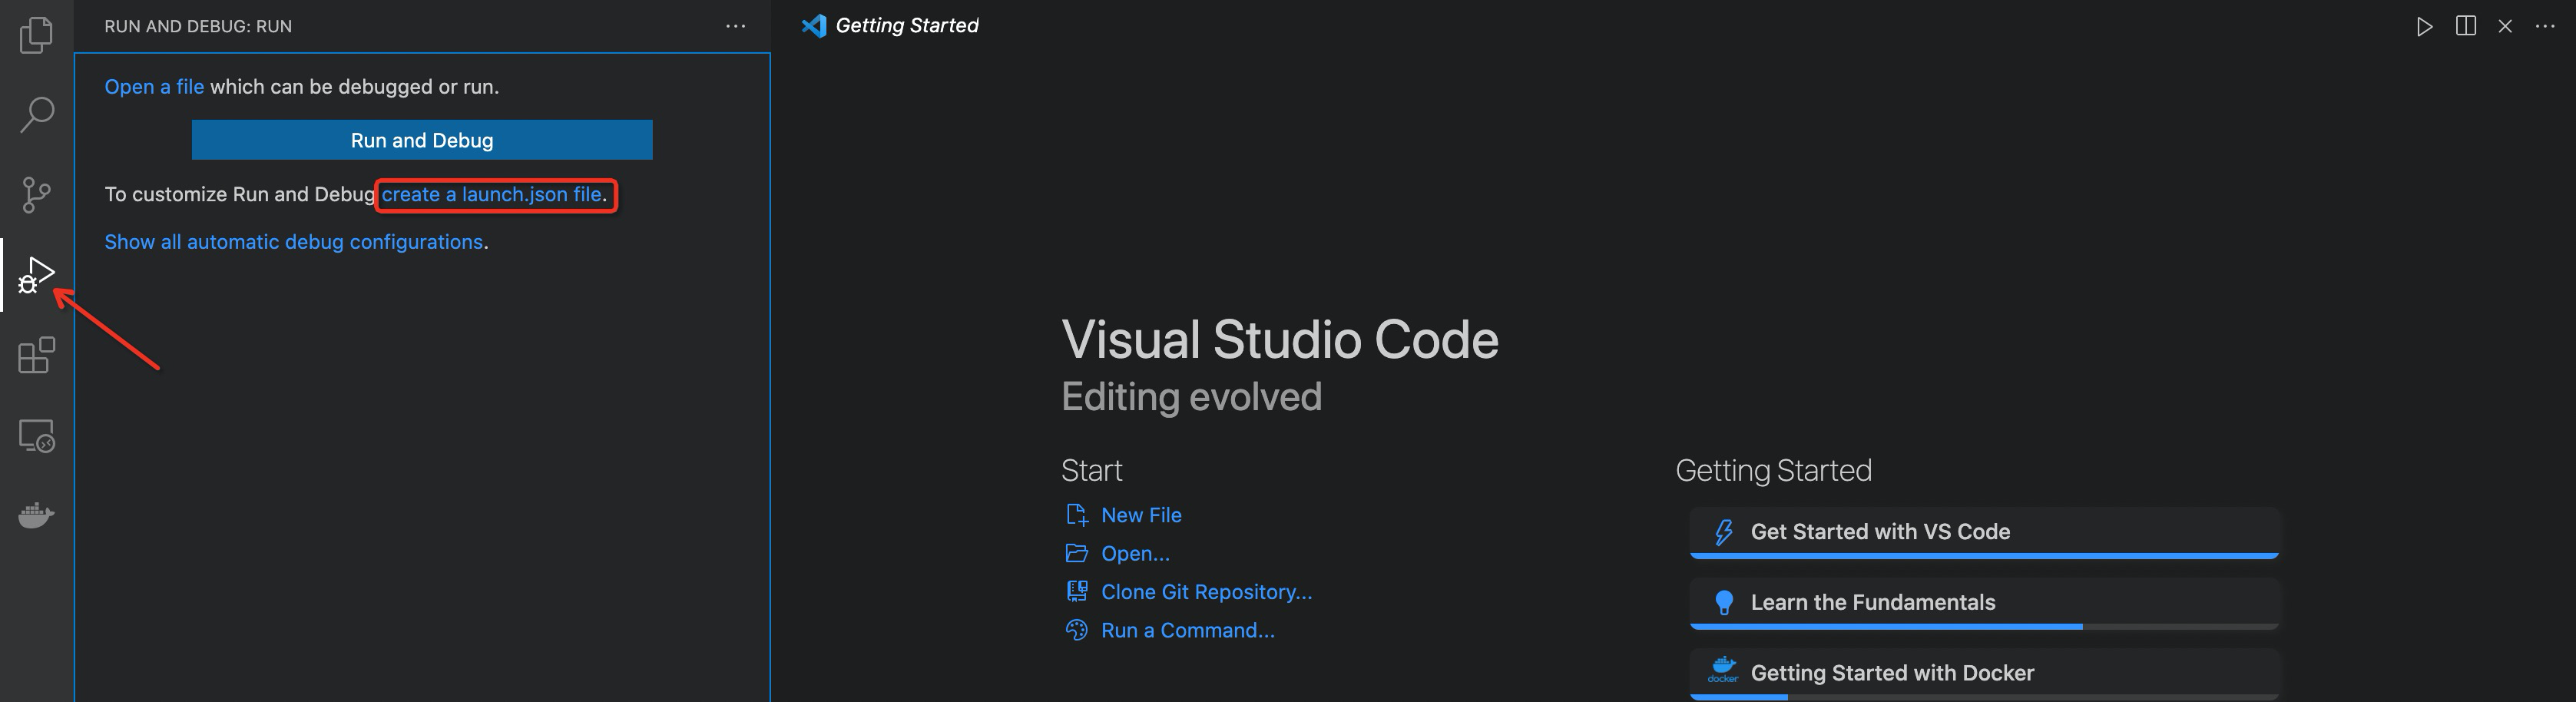 Then choose "Soliditypp" for the environment.This automatically generates a
 launch.json file which is used by VSCode to configure the debugger.
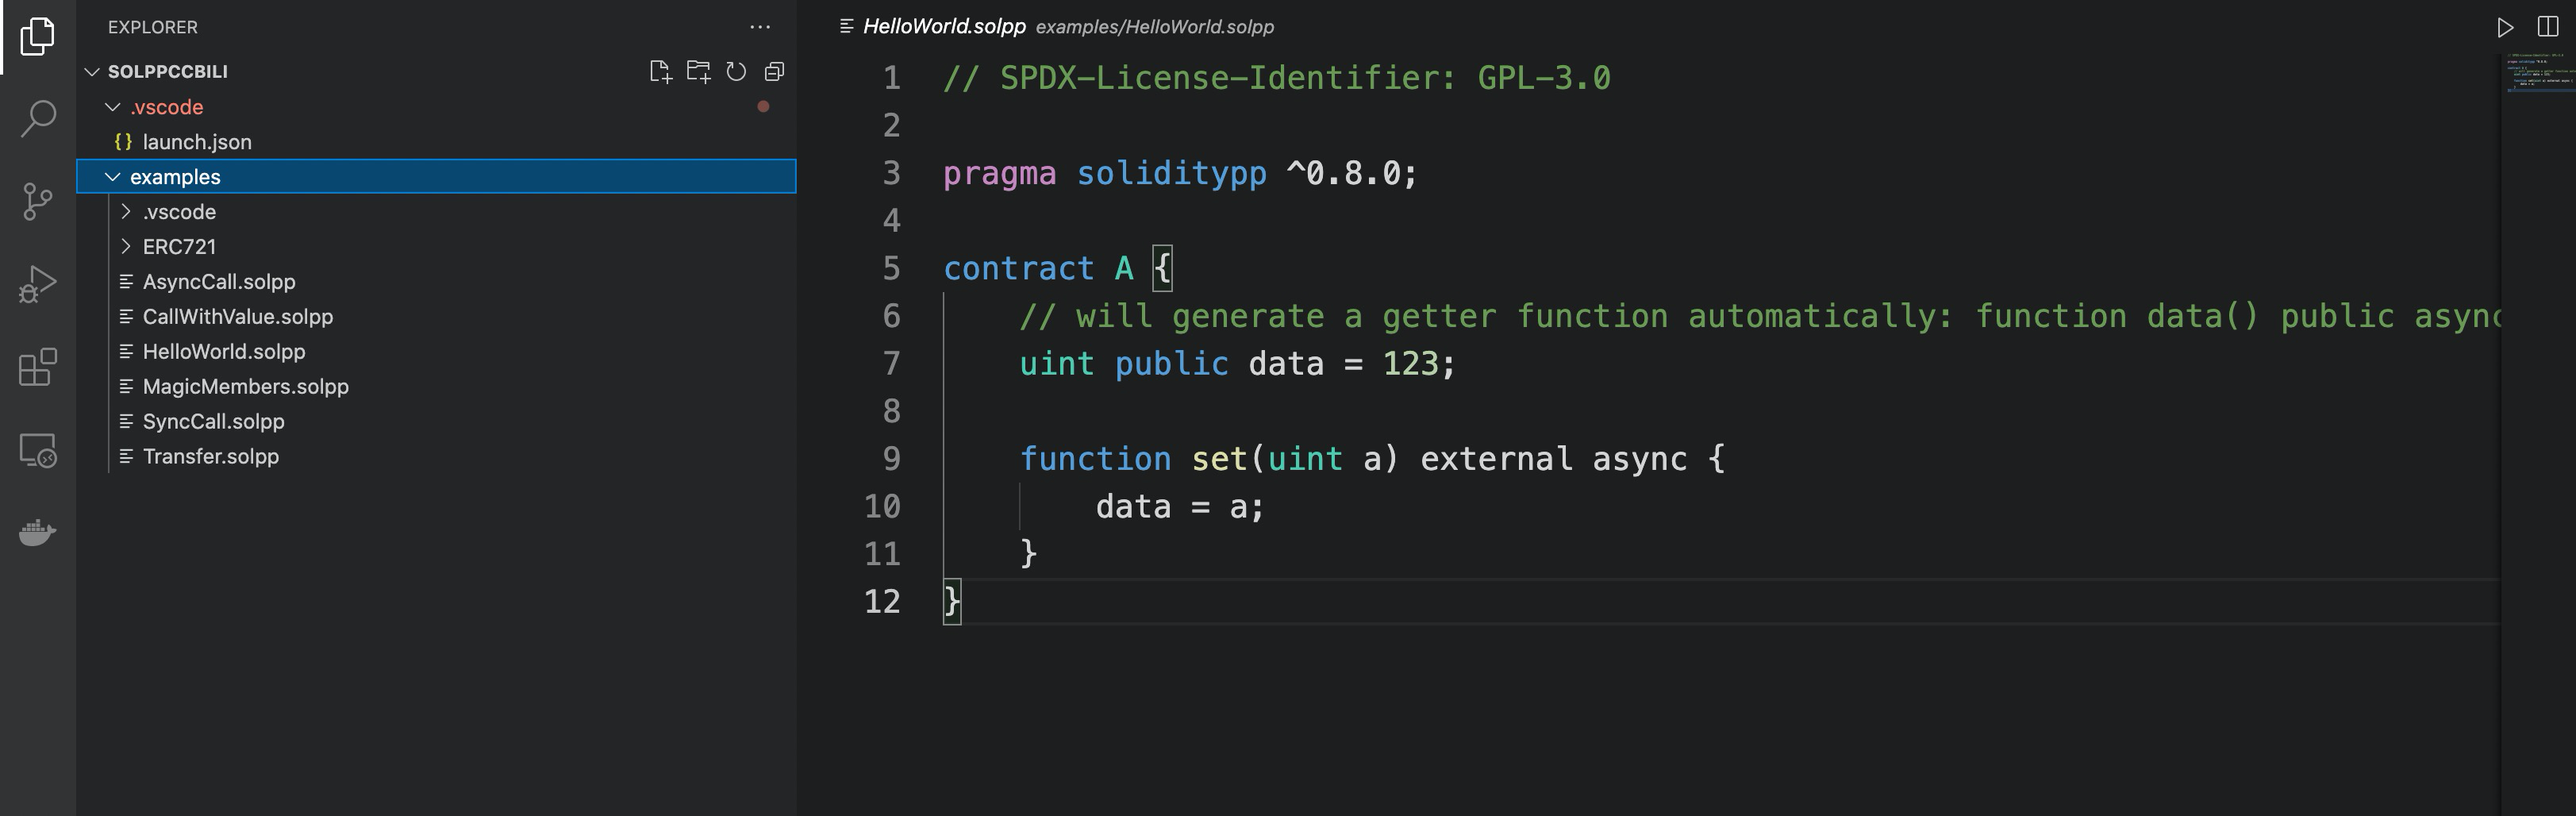
Create a new file named HelloWorld.solpp and type in the following code:
The contract has a set function setting an input value a to public state field data.
Note: Public field can be visited with an implicit view function in the same name.
Generate Examples
The legacy extension provides a command to generate a HelloWorld.solpp contract by pressing ⇧⌘P (on Mac) or Ctrl+Shift+P (on Windows) to open the Command Palette, then choosing the command >soliditypp: Generate HelloWorld. This has been replaced by >soliditypp: Generate Examples in extension Solidity++ 0.8.
 You can also fetch the examples from https://github.com/vitelabs/soliditypp-examples
# Debugging
Launch the debugger by pressing F5. This will automatically compile the contract and launch a debugger browser window.
Note: the extension will download
gvitenode for the first launch, stay patient!
Compiling Errors
If the debugger interface doesn't launch, check the debug console for any errors.

Gvite Version
Since 0.2.5, it's possible to specify the gvite release version by adding gviteVersion in launch.json in your working directory as below.
# Deployment
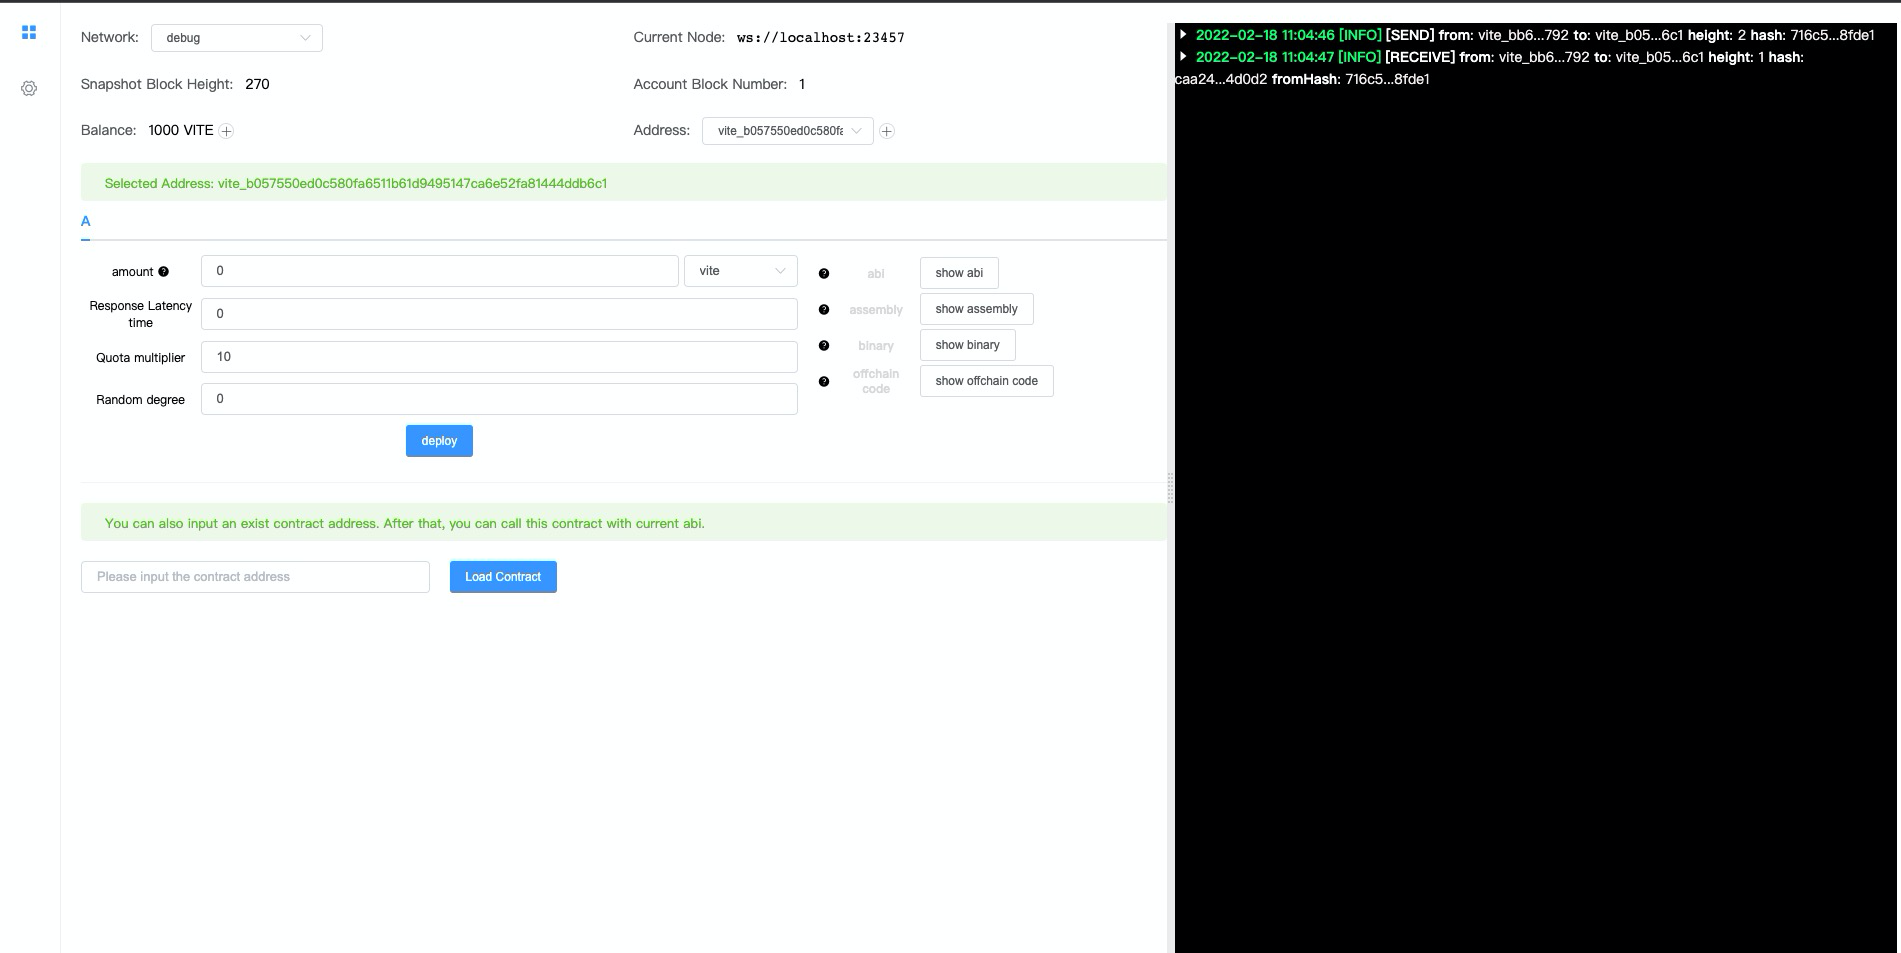
To deploy your contract to the local (debug) node, simply hit on Deploy as shown below. There are several options available, let's use the default values here.
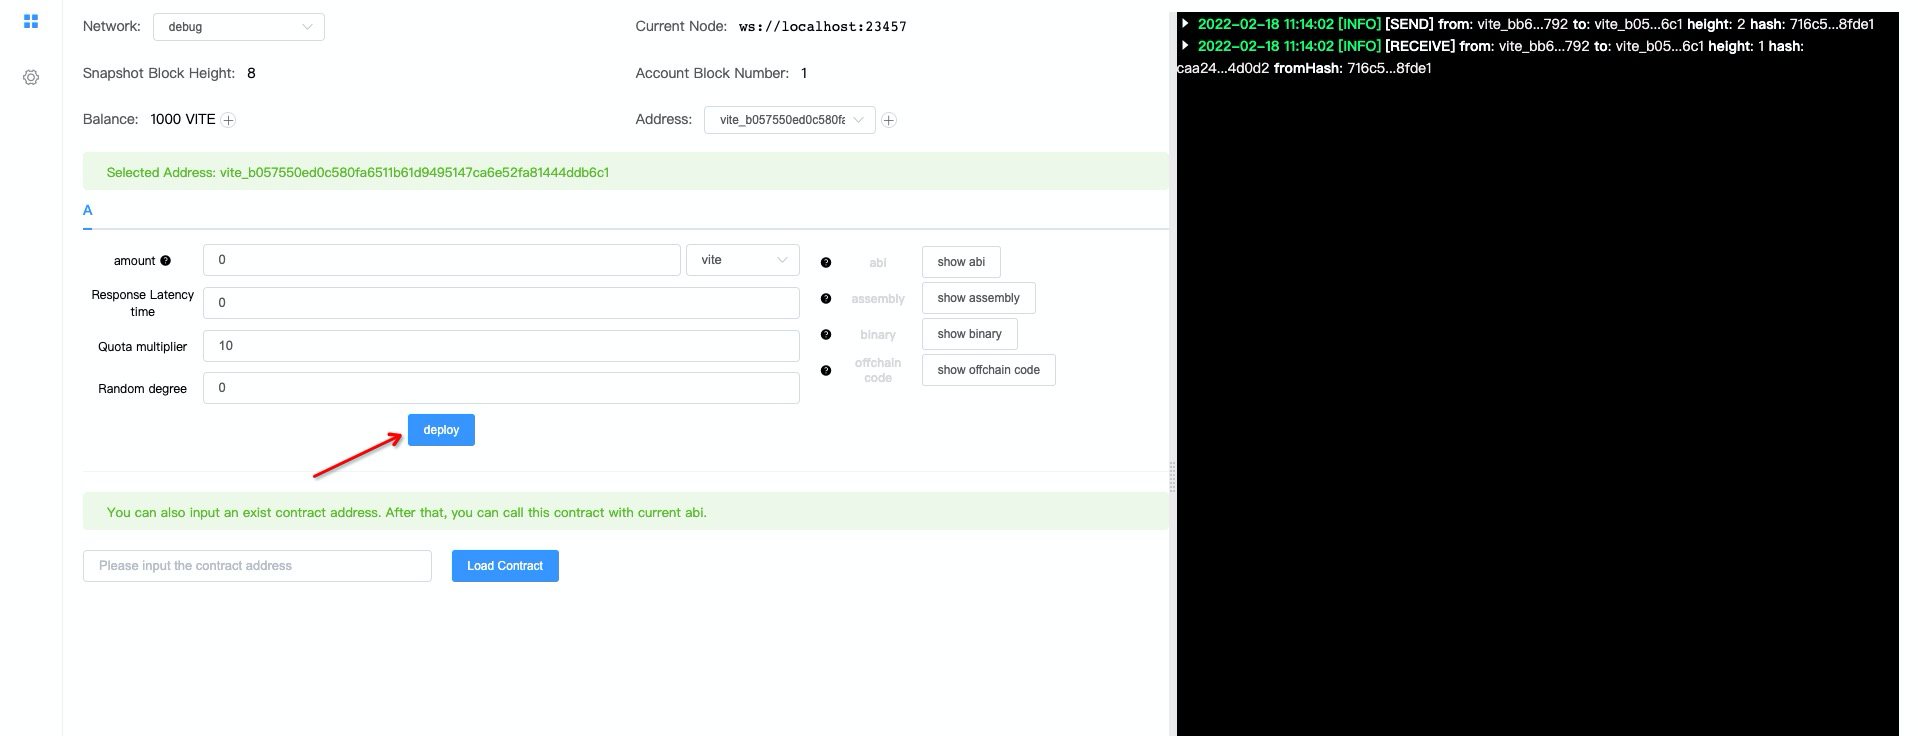
When the contract is deployed, a contract address will be displayed. We can call the contract now.
The right side of the window shows the execution result logs.
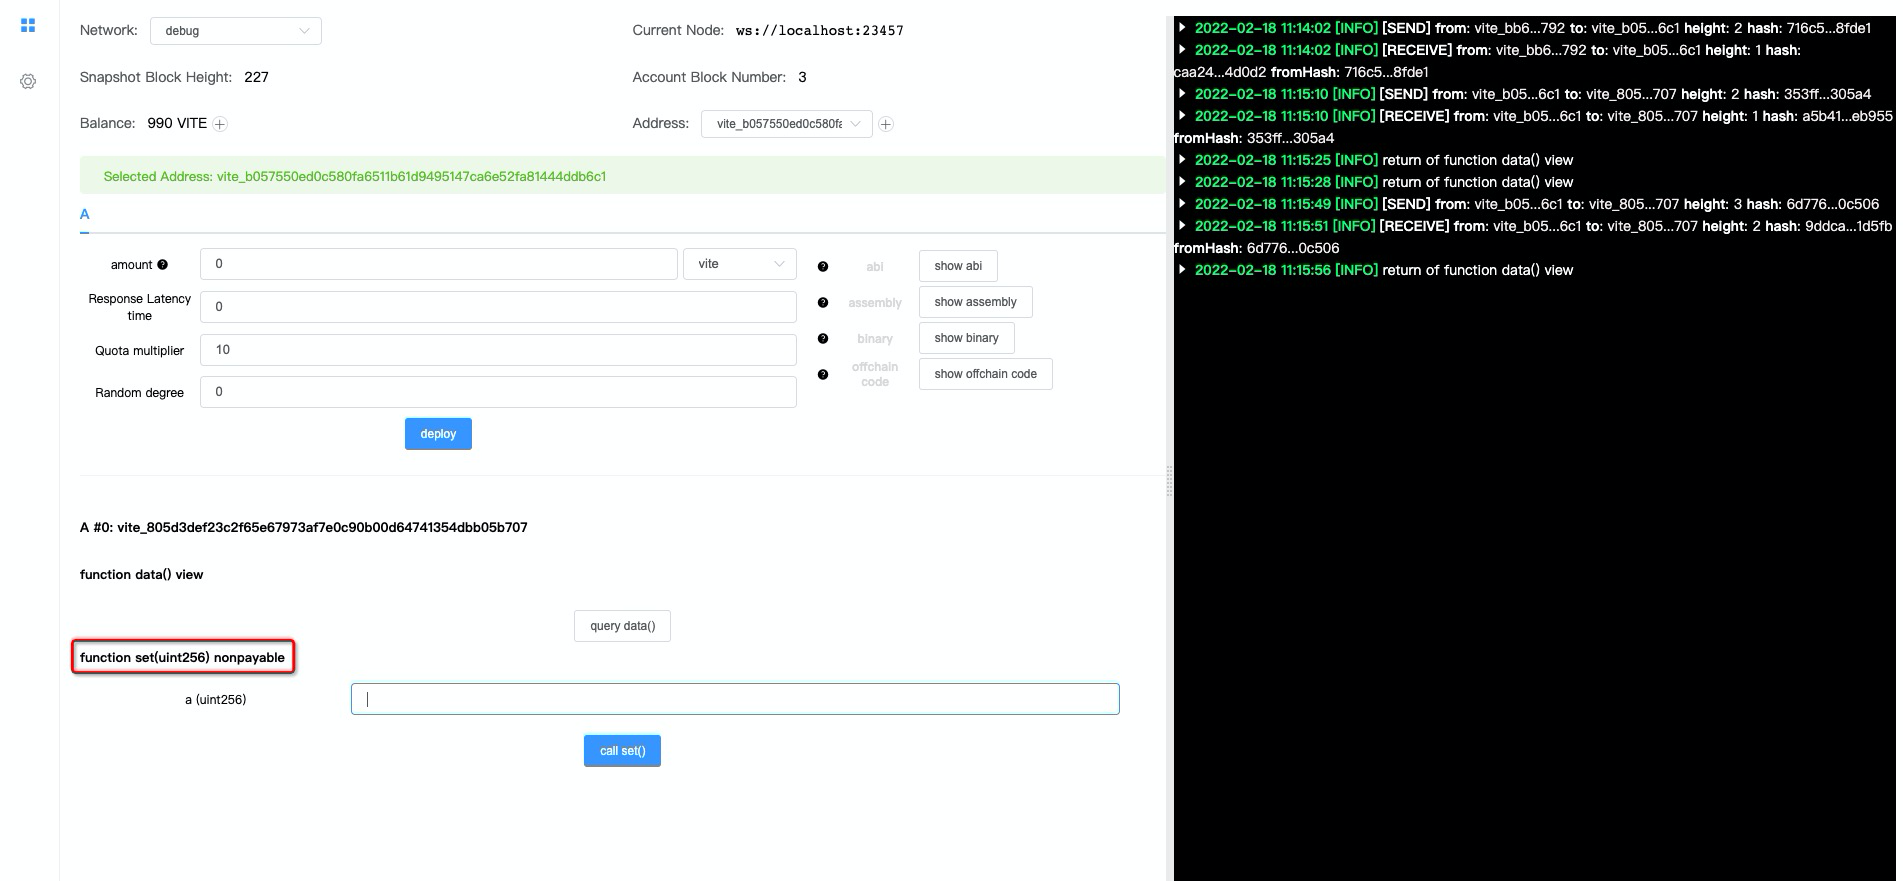
Let's choose the function set and feed an integer, then click on the call set() button. When the log shows the "[RECEIVE]" transaction has been executed, hit the query data() button to check if the data field has been updated.
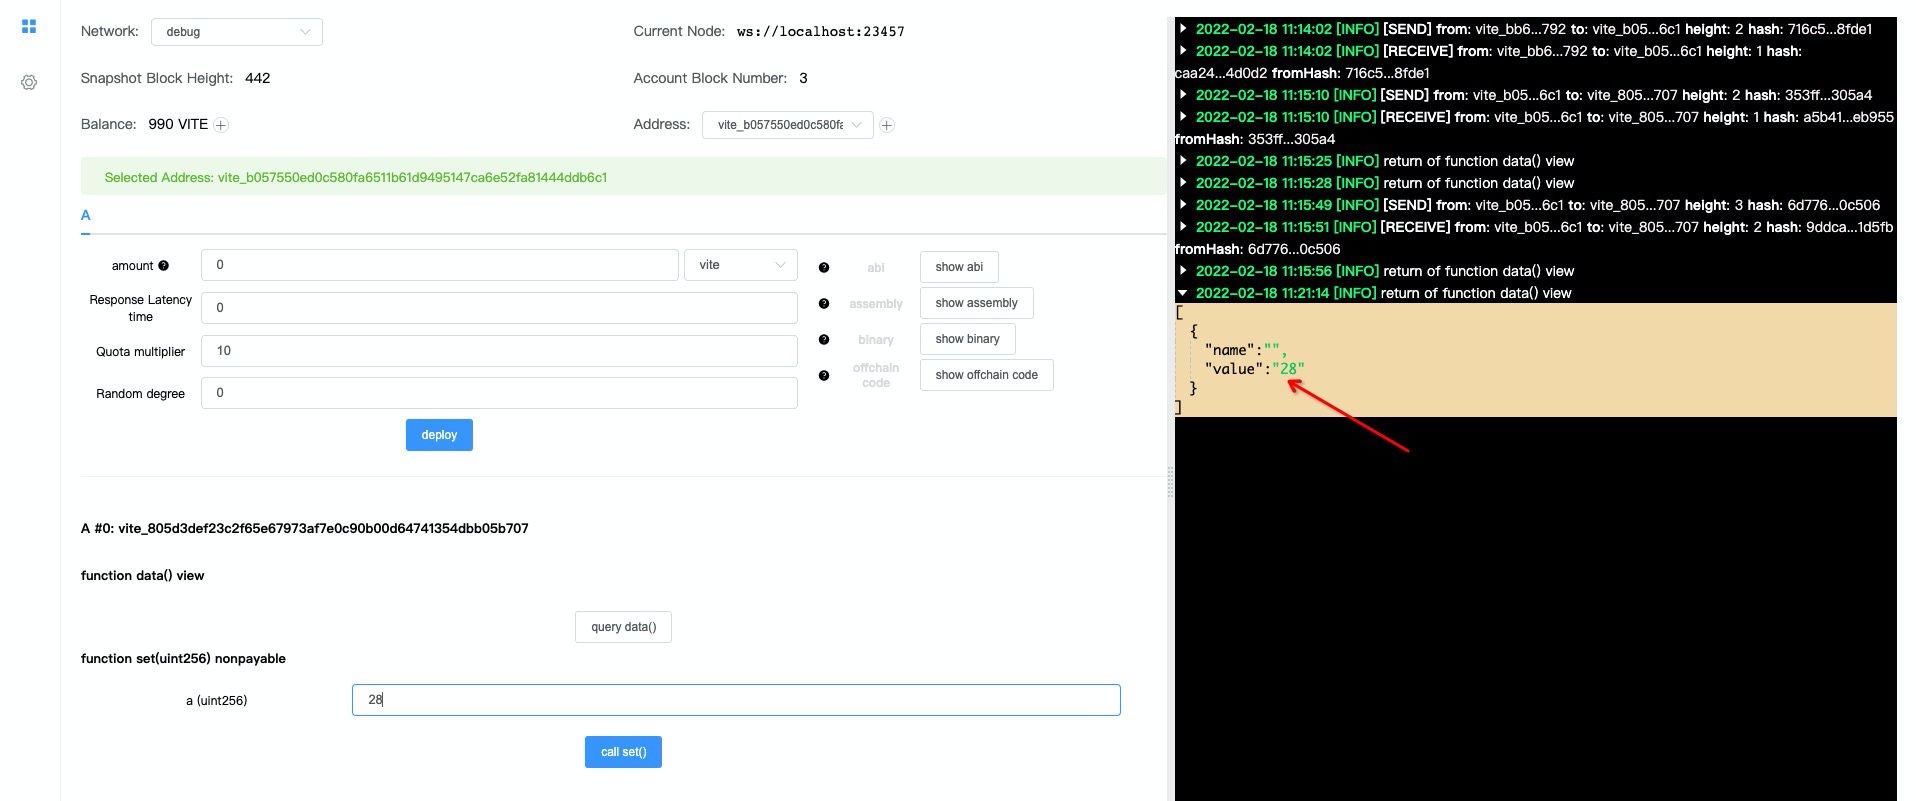
Congratulations! You've deployed and tested your first Solidity++ contract!